Scan Using the CLI
-
Use rfcat --help to list all available options for the CLI tool.
-
Use rfcat --list-benchmarks to list all available security benchmarks by OS. Titles are in black text, ID’s are in green text, OS' are in red text.
-
Use rfcat <image_name> --benchmark-id <benchmark_id> to run a benchmark against a given image.
-
Use rfcat --rfid <guid> --benchmark-id <benchmark_id> to run a benchmark against a given RapidFort ID.
-
Use rfcat --scan-host --benchmark-id <benchmark_id> to run a benchmark against the CLI host.
-
Use rfcat <image_name or guid> --benchmark-id <benchmark_id> -p <project_id> to add the job to a project.
-
Use rfcat <image_name or guid> --benchmark-id <benchmark_id> --save-reports <output_file> to save reports to a local destination.
-
Use rfcat <image_name or guid> --benchmark-id <benchmark_id> --remediate <remediation_file> to run the scan with the remediation script applied. This will save a remediated Dockerfile to your local directory.
-
Use rfcat <image_name or guid> --benchmark-id <benchmark_id> --auto-remediate to automatically apply the remediation script after your scan has completed.
-
Use rfcat <image_name or guid> --benchmark-id <benchmark_id> --cat-only to only run rfcat and prevent rfscan from being run on the container.
-
Use rfcat <image_name or guid> --benchmark-id <benchmark_id> --offline <destination_folder> ****to run rfcat in offline mode and only save reports to a local destination.
-
Copy the ID of a benchmark you would like to use against your image.
-
Use the following arguments to initiate a STIG scan:
rfcat <image_name or RapidFort ID> --benchmark-id <benchmark_id> -
If you would like to save reports, including the remediation script, to a local destination:
rfcat <image_name or RapidFort ID> --benchmark-id <benchmark_id> --save-reports <output_file> -
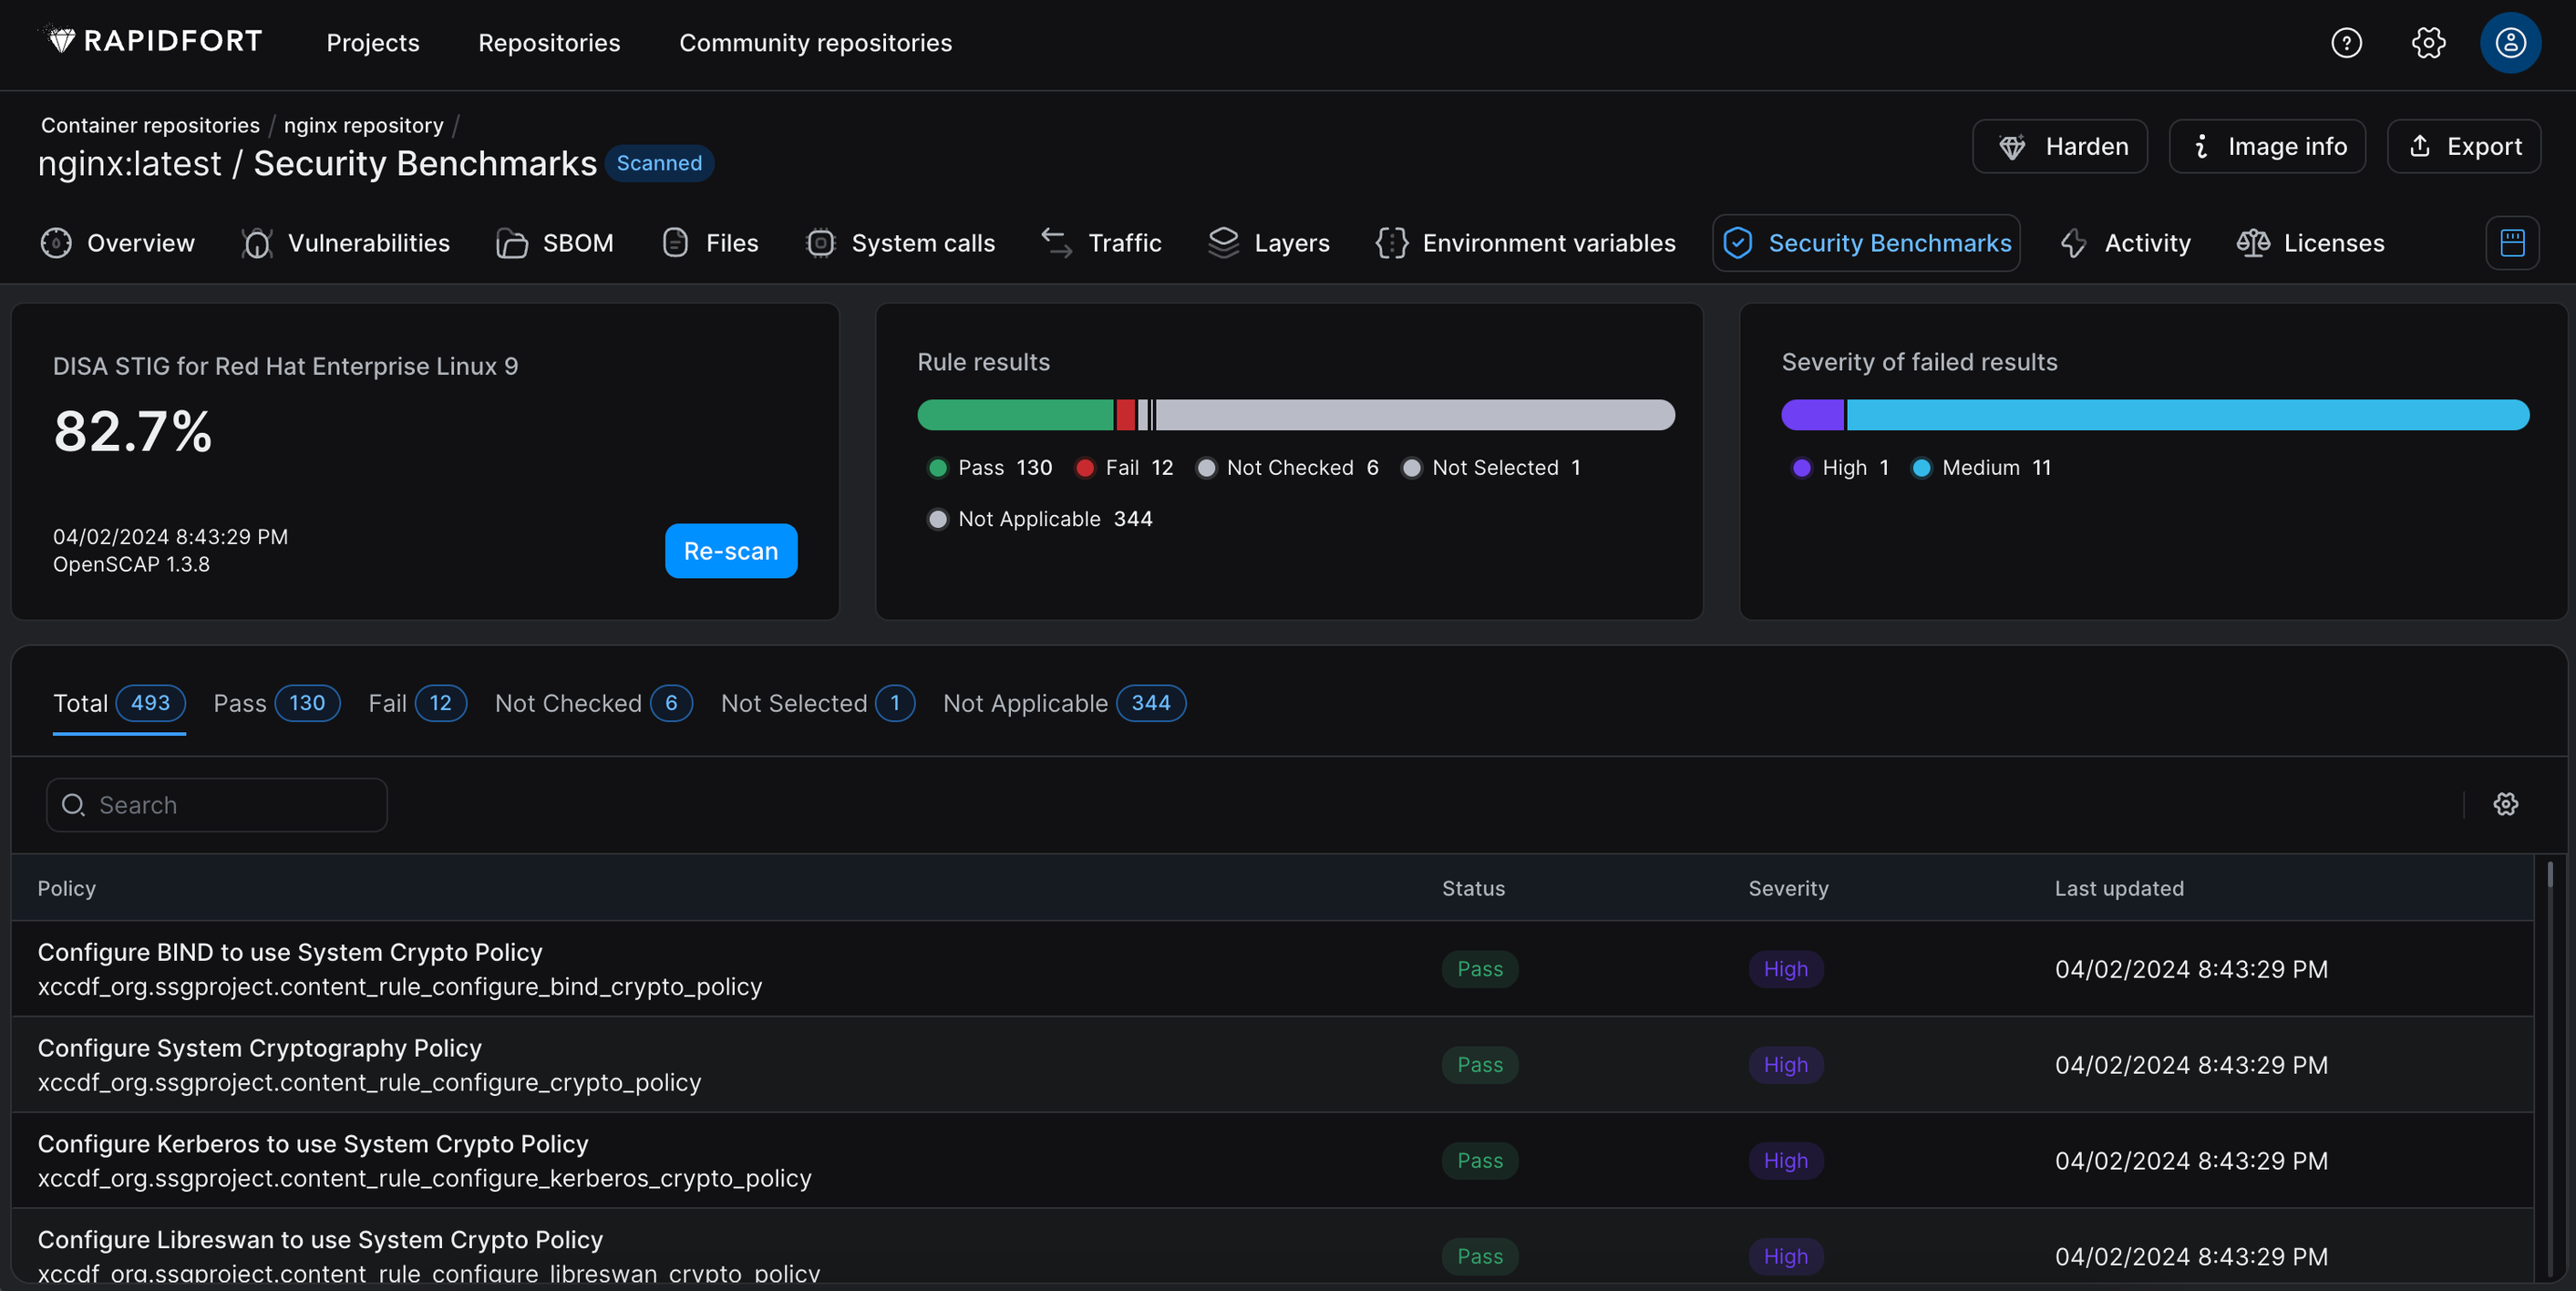
This will generate results that can be viewed from the UI.
-
Navigate to the UI > Container Repositories > <Repository Name> > <Image Name> > Security Benchmarks to view the results.
-
Now that you have successfully STIG scanned your image(s) you will notice many rules with pass/fail/not checked/not applicable status’. Clicking on individual rules gives you a Description, Rationale, References, and Remediation if available.
-
The UI displays buttons to download 4 reports for this image.
- JSON report
- HTML report
- CSV report
- Remediation.sh script
-
You can view these reports by downloading them from the UI under the Export button, or from your CLI in the folder created by --save-reports.
-
Using rfjobs, find the RapidFort ID of your STIG scanned image, and run another scan against it with the same benchmark, this time adding the remediation script as follows:
rfcat <RapidFort ID> --benchmark-id <benchmark_id> --remediate <remediation.sh> -
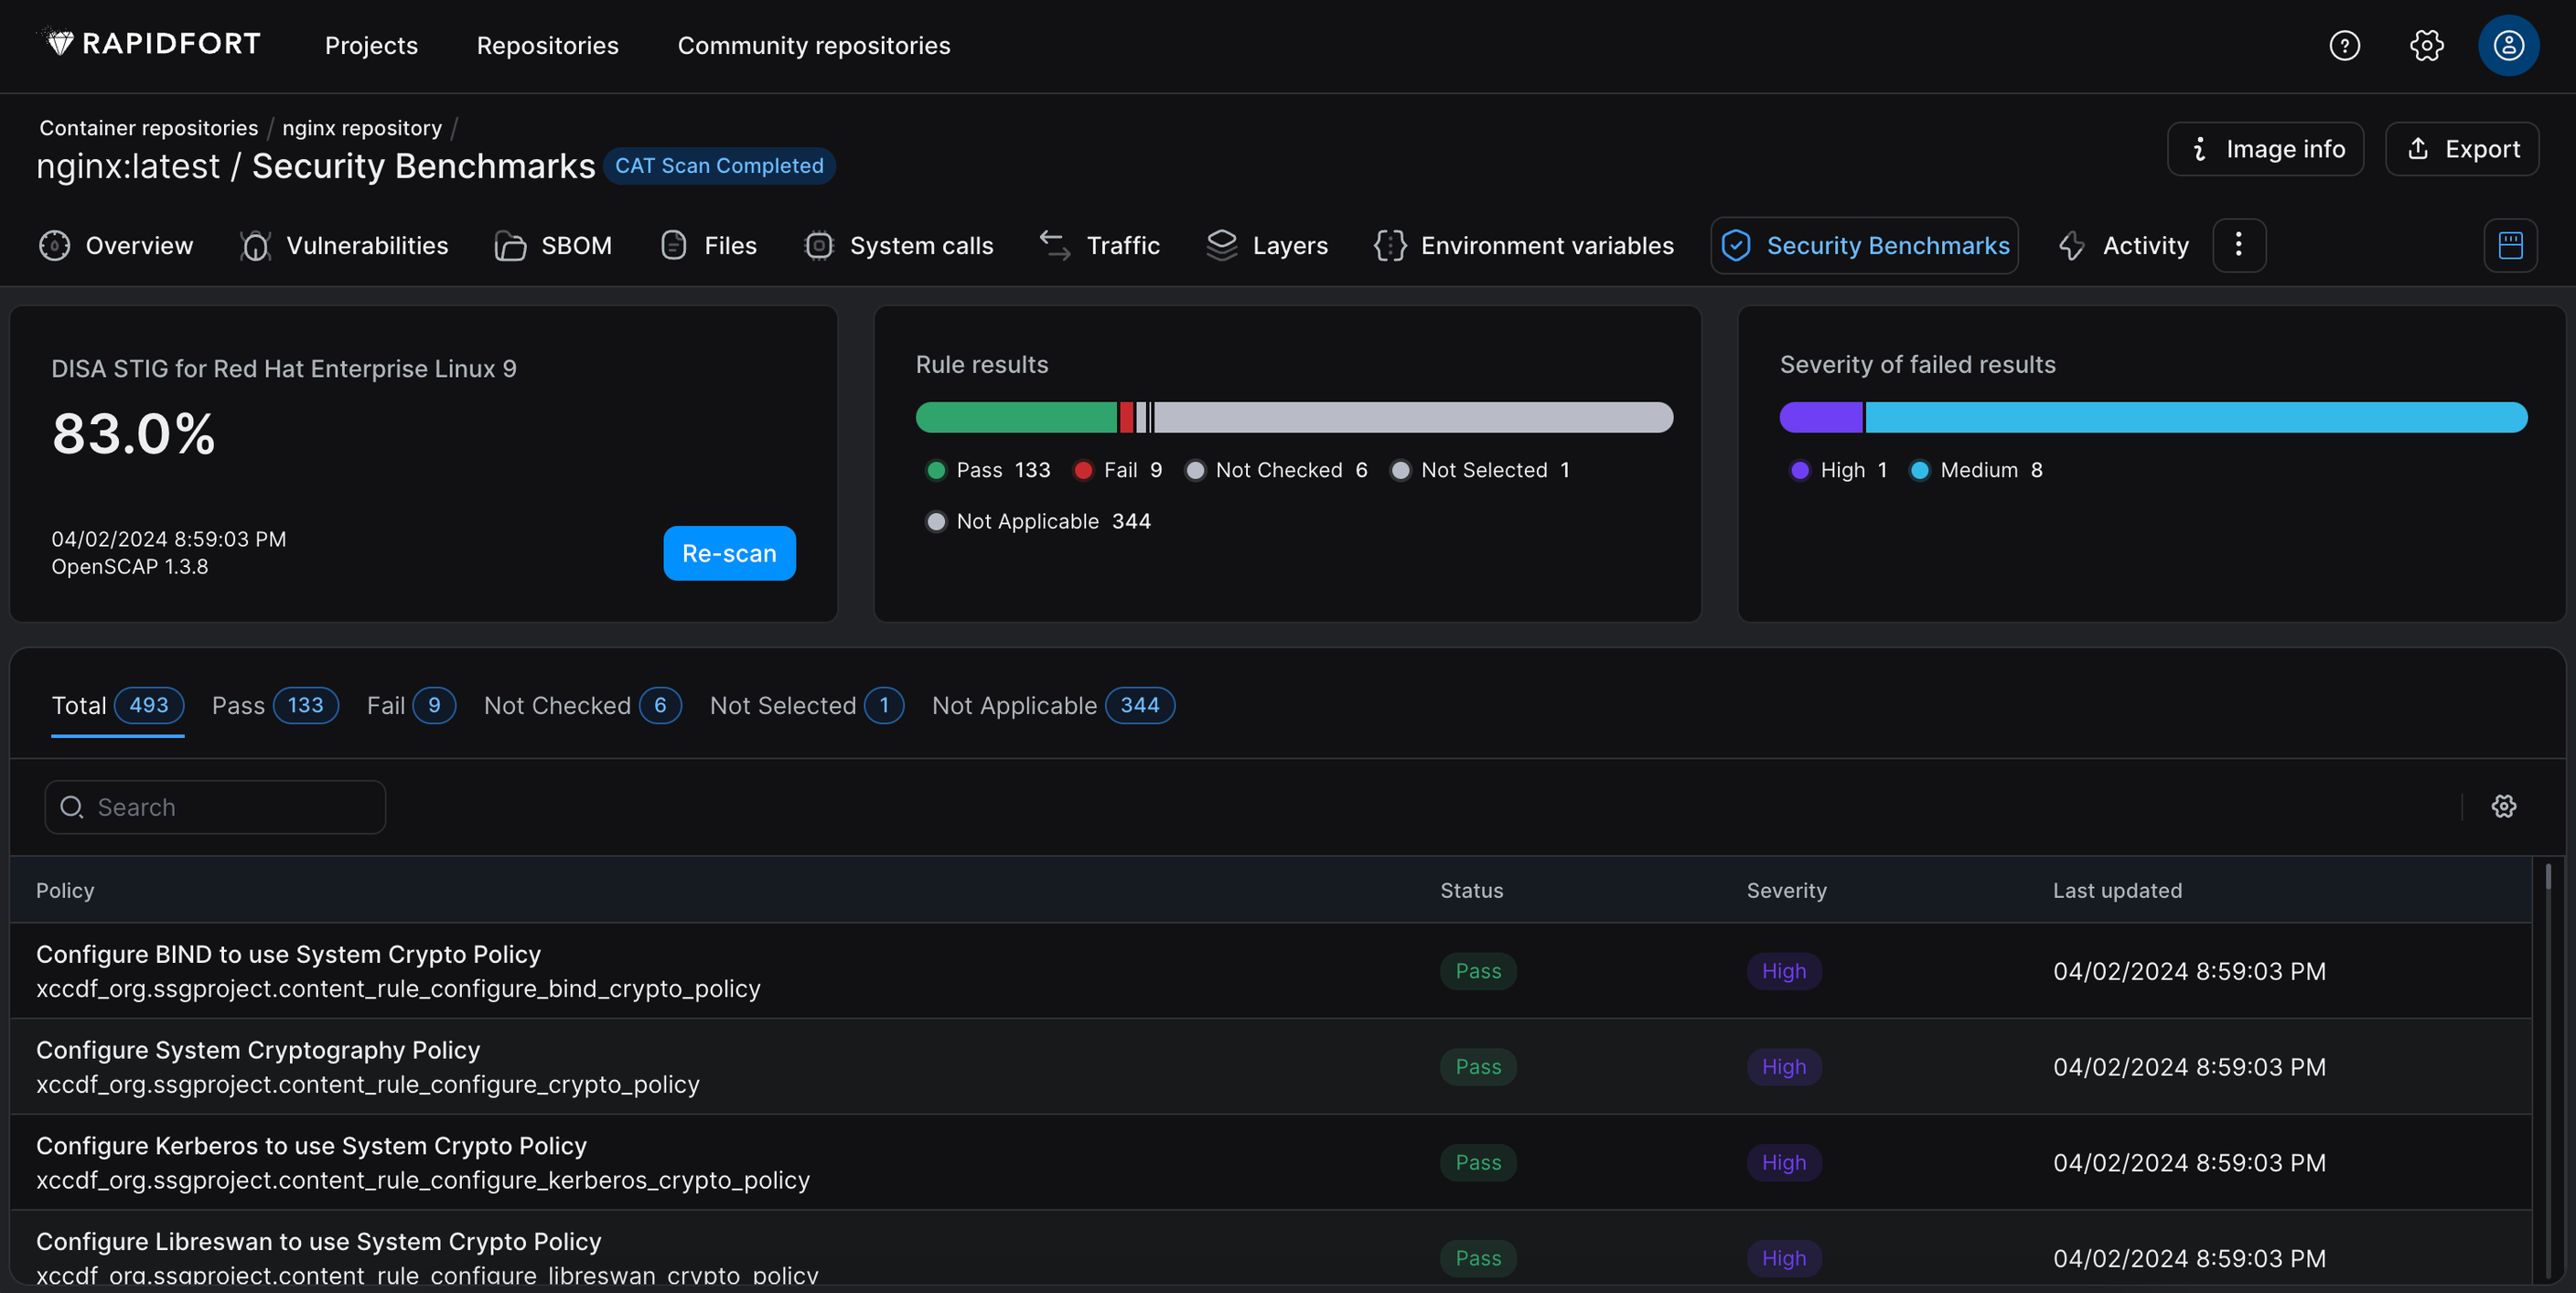
To generate a remediated Dockerfile in your current directory, run the STIG scan again with remediations. Once completed, navigate back to the same job in the UI. You should notice a number of previously failing rules are now passing.
Applying Remediations
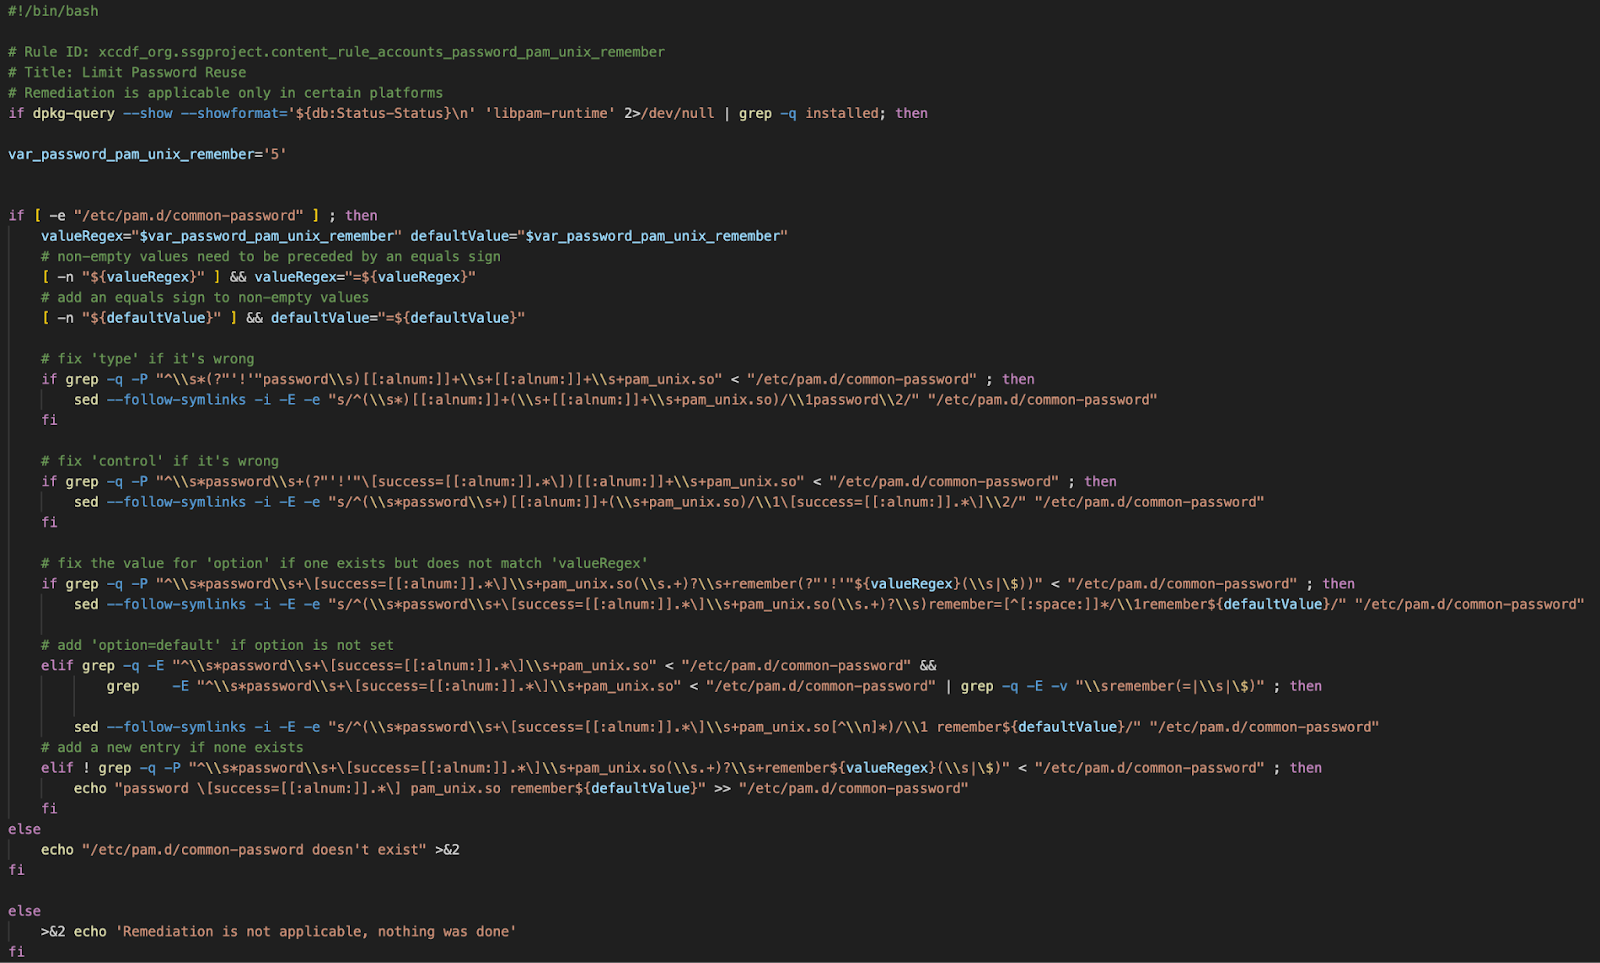
A remediation script is produced upon successful execution of the rfcat command. The RapidFort remediation script contains bash remediations for each rule that failed during your CAT scan.

The remediations for each failed rule are compiled into the RapidFort remediation script and are separated by Rule ID and Title.
The remediation script can be written, read, and executed by the client at their discretion.
Running a remediation script against your image with rfcat will produce a remediated Dockerfile in your current directory.
Example: Iron Bank NGINX
Log into Iron Bank and pull the latest NGINX image.
docker pull registry1.dso.mil/ironbank/opensource/nginx/nginx:latest
List the available security benchmarks:
rfcat --list
Choose a benchmark id, run it against your image, and save reports to a local destination:
rfcat registry1.dso.mil/ironbank/opensource/nginx/nginx:latest --benchmark-id xccdf_org.ssgproject.content_profile_stig --save-reports nginx_reports
This will generate results that can be viewed from the UI:

Navigate to the UI>Container Repositories>Repository Name>Image Name>Security Benchmarks to view the results.
Now that you have successfully STIG scanned your image(s) you will notice many rules with pass/fail/not checked/not applicable status’. Clicking on individual rules gives you a Description, Rationale, References, and Remediation if available.
The following four reports that we saved locally are also available for download under the Export button.
- JSON report
- HTML report
- CSV report
- Remediation.sh script
Using rfjobs, find the RapidFort ID of your STIG scanned NGINX image, and run another scan against it with the same benchmark, this time adding the remediation script as follows:
rfcat <RapidFort ID> --benchmark-id xccdf_org.ssgproject.content_profile_stig --remediate remediation.sh
To generate a remediated Dockerfile in your current directory, run the STIG scan again with remediations. Once completed, navigate back to the same job in the UI. You should notice a number of previously failing rules are now passing.
